Choosing the right video digitization ancient manuscripts workflow tools can literally mean the difference between preserving history and losing it forever. Ancient manuscripts are fragile — often far too delicate for a flatbed scanner pressing glass against centuries-old parchment. Video capture offers a gentler, faster alternative, and once you’ve seen it work, you won’t go back.
However, raw footage sitting on a hard drive isn’t useful to anyone. You need a structured workflow that moves from recording through editing and finally into text extraction pipelines. This guide covers every practical step, from camera setup to OCR-ready output. Furthermore, it bridges the gap between capturing manuscript footage and feeding it into optical character recognition systems — a connection that most guides completely ignore.
Why Video Capture Works for Ancient Manuscript Digitization
Essential Video Digitization Ancient Manuscripts Workflow Tools and Equipment
Step-by-Step Recording and Capture Best Practices
Editing, Frame Extraction, and Preprocessing for OCR Pipelines
Quality Assurance and Metadata Standards for Manuscript Video Digitization
Connecting Video Digitization Output to OCR and Text Extraction
Why Video Capture Works for Ancient Manuscript Digitization
Traditional scanning presses manuscripts flat against glass — genuinely dangerous for centuries-old parchment that’s already survived this long.
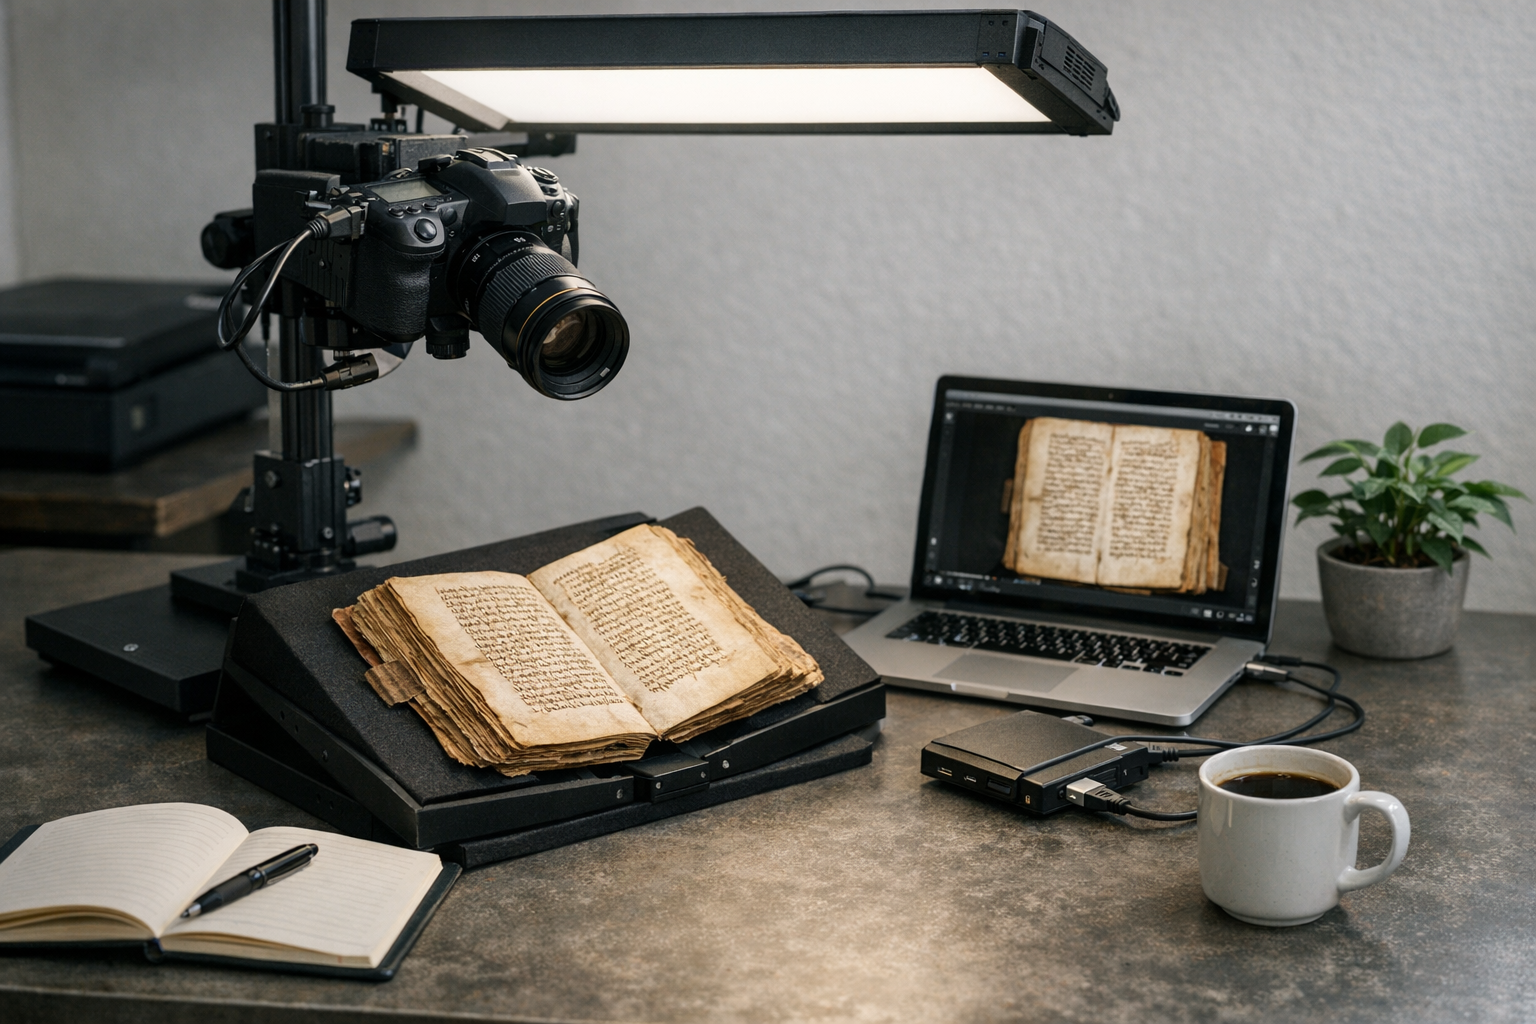
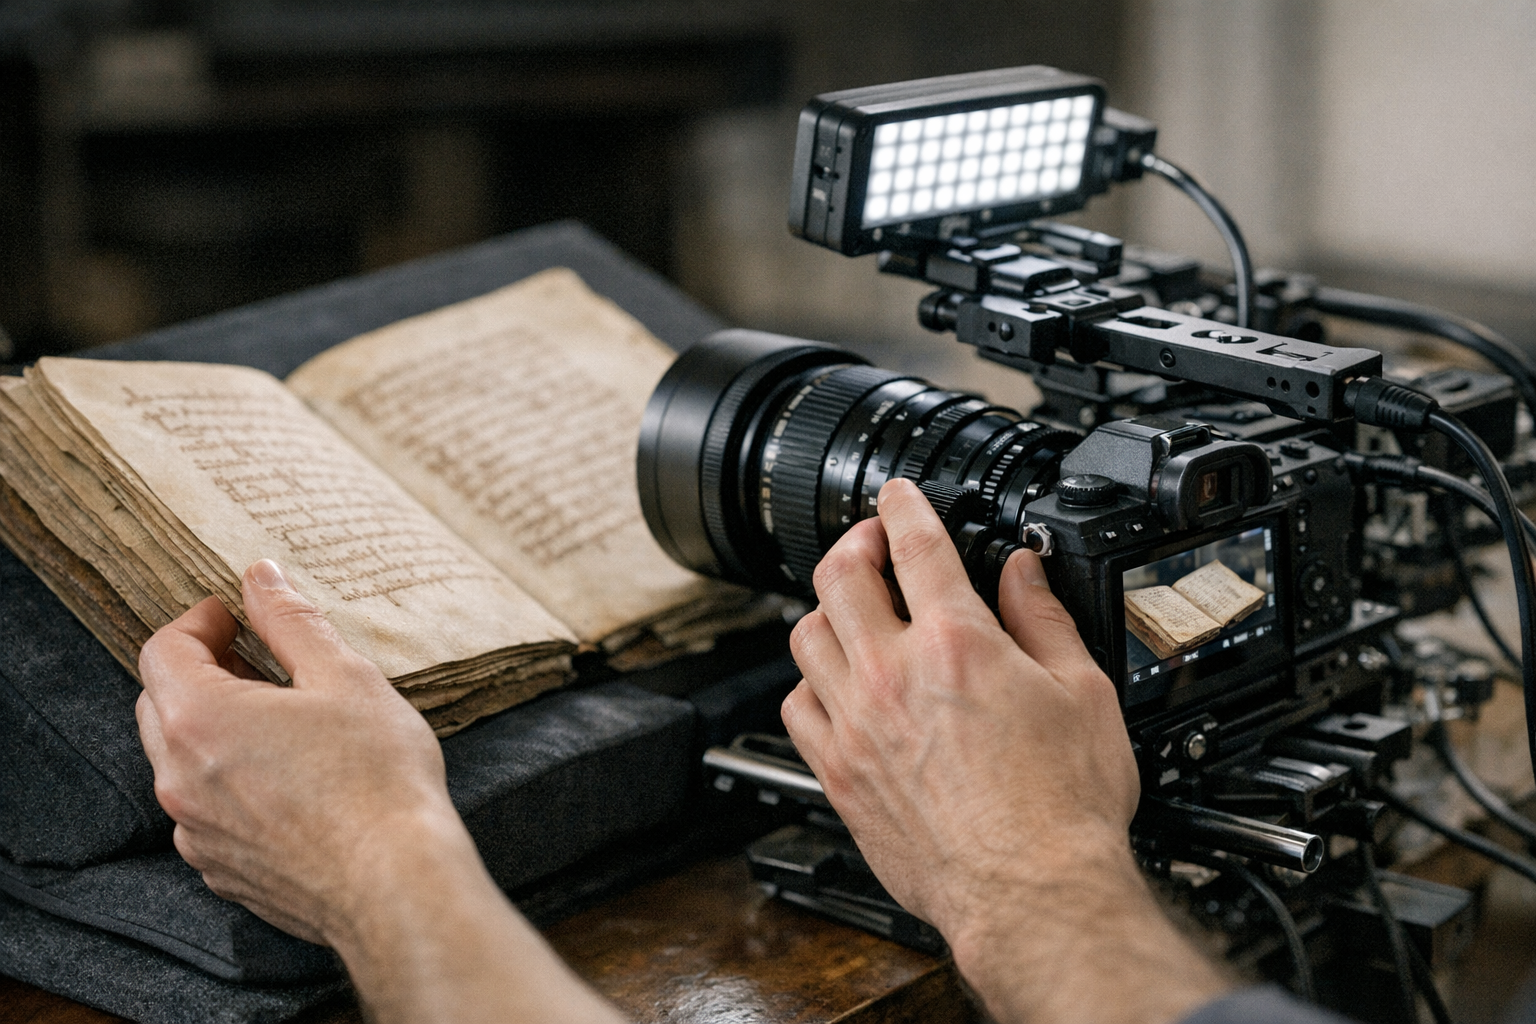
Video capture, conversely, lets you record pages without physical contact. A camera mounted above a cradle captures each page as someone carefully turns it. Operators can process entire codices this way without a single forced spine or cracked folio.
Speed matters too. A skilled operator can record hundreds of pages per hour, while flatbed scanning typically handles just 20–40 pages hourly. Consequently, video-based workflow tools for ancient manuscripts dramatically cut handling time — and less handling means less risk, full stop.
Additionally, video captures context that still images simply miss. You can record the binding structure, page texture, and even active damage patterns in a single pass. Researchers at institutions like the Library of Congress have long advocated for multi-modal capture approaches. Specifically, they recommend combining video with supplemental still photography for complete documentation.
Key advantages of video-based digitization:
Nevertheless, video capture introduces its own headaches. File sizes are enormous, color accuracy requires careful calibration, and frame extraction demands specialized software. That’s exactly why a structured workflow matters so much — you can’t just hit record and hope for the best.
Essential Video Digitization Ancient Manuscripts Workflow Tools and Equipment
Your video digitization ancient manuscripts workflow tools start with hardware. The camera, lighting, and mounting system form your capture foundation, while software handles everything downstream.
Camera selection is your first major decision. You’ll want a camera that shoots at least 4K resolution — that’s the floor, not the goal. Notably, many institutions now use 6K or 8K cameras for manuscript work, since higher resolution means better frame extraction later. The International Image Interoperability Framework (IIIF) provides standards for how these images should be served and shared once you’re done.
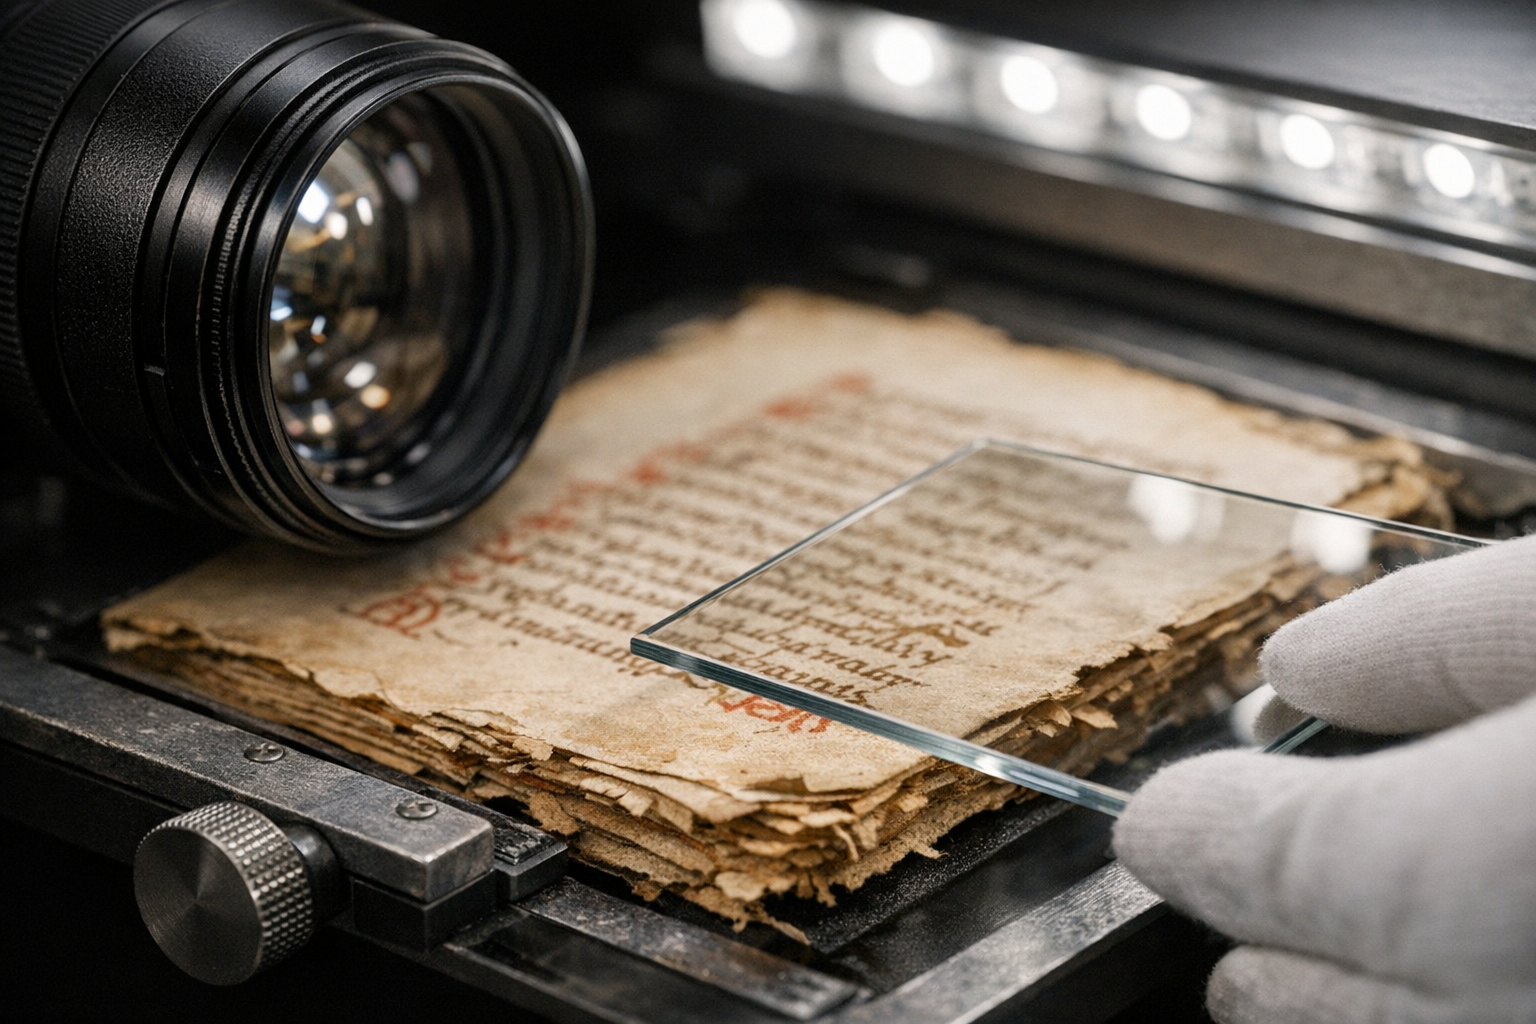
Lighting is equally critical. This is where the most amateur setups fall apart. Manuscripts need even, diffused illumination — LED panels with a Color Rendering Index (CRI) above 95 work best. Avoid direct flash entirely, because it creates glare on vellum and can damage pigments over time. That’s not a tradeoff worth making.
Mounting systems keep your camera perfectly aligned. A copy stand or overhead gantry prevents parallax distortion. Moreover, vibration isolation is essential — even slight camera movement during a three-second hold ruins frame extraction quality. Micro-blur that’s invisible on a camera’s LCD becomes obvious when you review footage on a larger monitor.
Here’s a comparison of common capture setups:
| Setup Type | Resolution | Throughput | Cost Range | Best For |
|---|---|---|---|---|
| DSLR on copy stand | Up to 45 MP stills | 30–50 pages/hr | $2,000–$8,000 | Small collections |
| 4K video gantry | 8.3 MP per frame | 100–200 pages/hr | $10,000–$25,000 | Medium collections |
| 6K+ cinema camera | 19+ MP per frame | 150–300 pages/hr | $25,000–$60,000 | Large-scale projects |
| Multispectral video | Variable | 50–100 pages/hr | $50,000+ | Damaged or palimpsest manuscripts |
Software tools round out your kit. You’ll need:
Importantly, your choice of video digitization tools should align with your downstream OCR requirements. If you’re targeting Kraken or Tesseract for ancient script recognition, your frame extraction settings need to match their input specifications precisely. Get that wrong and you’ll redo hours of work.
Step-by-Step Recording and Capture Best Practices
A reliable video digitization ancient manuscripts workflow follows a consistent recording protocol. Skipping steps here creates problems that no amount of post-processing can fix.
1. Environment preparation
Set your room temperature between 65–70°F (18–21°C) and keep humidity between 30–50%. These conditions protect the manuscript and prevent lens fogging. Similarly, minimize ambient light — your controlled LED setup should be the only light source in the room. Even a window you forgot to cover can introduce color cast that ruins an entire session.
2. Camera calibration
Shoot a color reference card before every session. The X-Rite ColorChecker is the industry standard here. Record white balance manually, because auto white balance shifts between takes and destroys consistency. Furthermore, set your focus manually — autofocus hunts during recording and creates unusable frames. This step feels tedious until you see what inconsistent footage looks like at scale.
3. Manuscript positioning
Place the manuscript in a book cradle that supports the binding at its natural opening angle. Never force a manuscript flat — that’s the whole point of this approach. Use weighted snakes (fabric tubes filled with glass beads) to hold pages gently without stress. Specifically, position the cradle so the text block fills approximately 80% of the frame.
4. Recording protocol
Start recording before the page turn and hold each page still for at least three seconds. This gives you clean frames for extraction. End recording after the page settles completely. Additionally, announce the folio number verbally — the audio track becomes a surprisingly useful metadata reference during post-processing.
5. Quality checkpoints
Review footage every 20–30 pages. Check for:
6. File management
Save raw footage immediately to two separate storage devices. Use descriptive file naming: [CollectionID]_[ManuscriptID]_[FolioRange]_[Date].[ext]. Therefore, you’ll always know exactly what each file contains without opening it. The number of projects derailed by chaotic file naming is genuinely staggering.
These recording best practices directly affect your downstream workflow tools and OCR accuracy. A poorly recorded session can’t be rescued in post-production — consequently, the discipline you build here pays dividends for every manuscript you process.
Editing, Frame Extraction, and Preprocessing for OCR Pipelines
Raw video footage isn’t OCR-ready. Not even close.
You need to extract the best frames, correct them, and prepare them for text recognition. This phase is where your video digitization ancient manuscripts workflow tools truly earn their value — and where most DIY attempts hit a wall.
Trimming and organization come first. Remove footage captured during page turns, focus adjustments, and accidental recordings. FFmpeg handles batch trimming efficiently through command-line scripting. Alternatively, visual editors like DaVinci Resolve let you mark in/out points manually. For quick browser-based trimming tasks, lightweight online editors can speed up the process considerably.
Frame extraction is the critical bridge between video and image — converting footage into high-quality stills. FFmpeg excels here:
“`
ffmpeg -i input.mov -vf “select=eq(ptype,I)” -vsync vfr output_%04d.tiff
“`
This command extracts only keyframes (I-frames), which carry the highest quality. Consequently, you avoid pulling blurry inter-frames into your image set. Export as uncompressed TIFF files, because JPEG compression destroys fine details in ancient scripts. That’s a tradeoff you can’t afford to make.
Color correction ensures consistency across your entire image set. Apply the color profile you created from your reference card and batch-process using ImageMagick or Adobe Lightroom. Moreover, convert to a standardized color space — sRGB works for web delivery, while Adobe RGB or ProPhoto RGB suit archival purposes.
Geometric correction fixes perspective distortion from curved manuscript pages. OpenCV provides excellent tools for this. Specifically, its perspective transform functions flatten curved text lines effectively. This step alone can dramatically improve OCR accuracy on bound manuscripts, particularly tightly-bound codices where pages curve sharply near the spine.
Binarization converts your color images to black and white for OCR processing. However, ancient manuscripts rarely have clean black-on-white text — parchment yellows, ink fades unevenly, and water damage leaves noise throughout. Adaptive thresholding handles uneven coloring far better than global methods. ScanTailor Advanced offers a user-friendly interface for this step.
The preprocessing pipeline in order:
1. Extract best frames from video
2. Apply color correction profiles
3. Crop to text area with consistent margins
4. Correct geometric distortion
5. Denoise while preserving fine strokes
6. Binarize using adaptive thresholds
7. Export in OCR engine’s preferred format
Notably, each step should be non-destructive. Keep your original extracted frames untouched and save processed versions separately. This lets you reprocess later as OCR technology improves — and it will improve, so don’t paint yourself into a corner.
The entire preprocessing workflow connects directly to ancient script OCR engines like Kraken, which was specifically designed for historical document recognition. Your video digitization workflow tools need to produce output that these engines can actually consume.
Quality Assurance and Metadata Standards for Manuscript Video Digitization

Quality assurance isn’t optional. It’s what separates a professional video digitization ancient manuscripts workflow from a well-intentioned mess. Similarly, proper metadata transforms raw files into searchable, shareable research assets — without it, you’ve created a very expensive hard drive of mystery images.
Image quality metrics should be checked systematically. Measure resolution in pixels per inch (PPI), since archival standards typically require 400 PPI minimum for text documents. Although video-extracted frames may fall slightly below scanner resolution, 4K footage from a properly configured setup easily clears this threshold.
Sharpness testing uses standardized targets. The ISO 12233 resolution chart provides objective measurements. Capture it at the start of each session alongside your color card. You’ll then have quantifiable proof of your system’s performance — which matters enormously when institutions ask for documentation.
Batch quality checks catch problems before they compound. Review every tenth extracted frame at 100% zoom. Look for:
Metadata is equally vital. Every digitized manuscript needs structured descriptive information. The Text Encoding Initiative (TEI) provides complete guidelines for manuscript description. Your metadata should include:
Furthermore, embed technical metadata directly in your TIFF files using EXIF and XMP standards. This ensures the information travels with the file, because external metadata databases fail, get migrated badly, or simply become separated from their files over time. Inheriting a digitization project with no metadata database is a nightmare — don’t leave that problem for someone else.
Version control matters throughout your workflow tools pipeline. Track which processing steps have been applied to each image and use checksums (MD5 or SHA-256) to verify file integrity. Importantly, document your entire workflow so other institutions can reproduce it.
Naming conventions should follow institutional standards. If you’re establishing your own, include these elements:
A well-documented quality assurance process makes your digitized manuscripts useful for decades. Meanwhile, poor documentation renders even excellent captures nearly worthless to future researchers. The capture is only half the job.
Connecting Video Digitization Output to OCR and Text Extraction
The ultimate goal of your video digitization ancient manuscripts workflow tools is producing machine-readable text. Everything before this point was preparation.
Choosing the right OCR engine depends entirely on your manuscript’s script. Tesseract handles many modern scripts reasonably well. However, ancient and historical scripts need specialized engines — Kraken supports training custom models for virtually any writing system, while Transkribus uses handwritten text recognition (HTR) powered by neural networks. For genuinely ancient scripts, Kraken’s trainability is a clear advantage.
Training data preparation often starts with your digitized frames. You’ll need ground truth — manually transcribed text paired with corresponding images. Consequently, your frame extraction quality directly affects model training, since clean, well-aligned images produce better training data and better models. Garbage in, garbage out.
Batch processing is essential for large collections. Set up automated pipelines using shell scripts or Python workflows and process images through your entire chain: extraction, correction, binarization, and OCR. Additionally, implement error logging so you can identify and fix problems without reprocessing everything from scratch. That last part will save you hours of frustration.
Output formats vary by use case:
Therefore, your video digitization workflow should accommodate multiple output formats, since different researchers and platforms need different things. Build that flexibility in early — retrofitting it later is painful.
Post-OCR correction catches recognition errors. Automated spell-checking doesn’t work for ancient languages, so use specialized tools that compare OCR output against known word lists for the target language. Manual review by scholars remains the gold standard for accuracy. There’s no shortcut around that for high-stakes projects.
Integration with digital libraries is the final step. IIIF-compatible viewers display your digitized manuscripts alongside their transcriptions, making your work accessible to researchers worldwide. Notably, the entire pipeline — from video capture to searchable text — represents a complete video digitization ancient manuscripts workflow that institutions can adopt and adapt for their own collections.
Conclusion
Building an effective video digitization ancient manuscripts workflow tools pipeline requires careful attention at every stage. From camera selection through frame extraction, preprocessing, and OCR integration, each step builds directly on the previous one — cut corners early and you pay for it at the end.
Start by investing in proper capture equipment and controlled lighting. Establish consistent recording protocols that your whole team follows every session. Furthermore, implement rigorous quality assurance checks throughout the process. Use standardized metadata to make your digitized manuscripts discoverable and reusable for the researchers who’ll rely on this work for decades.
The workflow tools you choose should match your collection’s scale and your target scripts. Small projects can start with affordable DSLR setups and free software like FFmpeg and Kraken. Larger initiatives benefit from cinema-grade cameras and automated processing pipelines. Either way, the methodology scales.
Here are your actionable next steps:
1. Audit your current equipment against the requirements outlined above
2. Download and test FFmpeg and Kraken with sample manuscript footage
3. Establish your metadata schema following TEI and Dublin Core standards
4. Create a documented, repeatable video digitization ancient manuscripts protocol
5. Run a pilot project with a small manuscript section before scaling up
Every manuscript you digitize using these workflow tools and best practices contributes to preserving human knowledge that might otherwise disappear. The technology is accessible, the standards are established, and the need is urgent. Start capturing.
FAQ
What resolution do I need for video digitization of ancient manuscripts?
Aim for 4K resolution minimum for manuscript video capture — that’s the floor, not the ceiling. At proper working distances, 4K footage yields approximately 8.3 megapixels per extracted frame, which is sufficient for most text recognition tasks. However, 6K or 8K cameras produce significantly better results, especially for manuscripts with fine details like marginalia or small annotations. Importantly, resolution alone isn’t enough, since sharp optics and stable mounting matter just as much as the number on the spec sheet.
Can I use a smartphone for manuscript video digitization?
Modern flagship smartphones shoot excellent 4K video and can work for personal research or small projects. Nevertheless, they lack the color accuracy, manual controls, and mounting stability that professional video digitization ancient manuscripts workflow tools require. Specifically, smartphones struggle with consistent white balance and manual focus — two things that can’t drift during a session. For archival-quality work, dedicated cameras are strongly recommended.
How much storage space does manuscript video digitization require?
Storage needs vary dramatically based on your settings. Raw 4K video consumes approximately 1.5–3 GB per minute. A 200-page manuscript recorded at three seconds per page generates roughly 10 minutes of footage — or 15–30 GB of raw video. Additionally, extracted frames and processed images multiply that figure considerably. Budget at least 100 GB per manuscript for the complete workflow pipeline, including all intermediate files. That number catches people off guard the first time.
What’s the difference between video frame extraction and traditional scanning?
Traditional scanning captures one high-resolution still image per page, while video frame extraction pulls individual frames from continuous footage. Scanning typically produces higher resolution per image — that’s the honest tradeoff. Conversely, video capture is faster and involves less manuscript handling. Moreover, video preserves temporal information about page structure and condition that a single still simply can’t capture. The best video digitization workflow tools combine the speed of video with preprocessing techniques that approach scanner-level quality.
Which free software tools work best for manuscript video digitization?
Several excellent free tools support the entire pipeline. FFmpeg handles video trimming and frame extraction. ScanTailor Advanced manages cropping and binarization. ImageMagick performs batch color correction. Kraken provides OCR specifically designed for historical documents. GIMP offers manual image editing when needed. Additionally, OpenCV (through Python) enables custom geometric correction scripts. Together, these free video digitization ancient manuscripts workflow tools can produce genuinely professional results — worth trying before you spend money on commercial alternatives.
How do I handle damaged or faded manuscript pages during video capture?
Keep reading
Here are the latest posts from the blog.