The multi-model strategy has crossed the line from interesting theory to genuine survival tactic. Teams still running a single large language model (LLM) in production are bleeding money, missing latency targets, and shipping worse results than their competitors. That era is over — and honestly, it’s been over for a while.
Every serious AI deployment in 2025 uses multiple models. Not because it’s trendy, not because some consultant said so, but because the math demands it. Cost-per-token economics, latency SLAs, and task-specific accuracy all point the same direction. One model can’t win everywhere. Therefore, the only rational architecture layers models by strength.
I’ve watched production AI deployments long enough to see the pattern repeat itself. Teams resist the complexity, go all-in on one provider, and eventually hit a wall — usually a billing wall. This piece gives you the decision matrix, the cost data, and the deployment patterns you actually need. No philosophy. Just the engineering and business logic behind why a multi-model strategy is now consensus among production teams.
Why Single-Model Architectures Fail
The Cost-Per-Token Math That Makes Multi-Model Routing Essential
The Decision Matrix: Which Models to Layer and When
Building the Routing Layer: Practical Architecture Patterns
The 2025–2026 Competitive Picture and Why Lock-In Is Dangerous
Why Single-Model Architectures Fail
Betting everything on one model feels simple. It isn’t.
Specifically, single-model deployments create three failure modes that compound over time — and the frustrating part is that they’re entirely predictable.
Cost blowouts. GPT-4o costs roughly $2.50 per million input tokens. Meanwhile, DeepSeek offers comparable reasoning at a fraction of that price for many tasks. Routing every request — including simple classification or summarization — through a premium model is like flying first class to the grocery store. Consequently, teams report 3–5x overspend when they skip tiered routing.
Latency mismatches. A customer-facing chatbot needs sub-second responses, but a background document analysis job can tolerate 30 seconds. Nevertheless, a single-model setup forces one latency profile onto every use case. Fast models sacrifice depth. Deep models sacrifice speed. You can’t have both from one endpoint — and pretending otherwise just delays the reckoning.
Accuracy ceilings. No single model dominates every benchmark. Claude 3.5 Sonnet excels at nuanced writing and code generation. GPT-4o handles multimodal tasks well. DeepSeek-R1 punches above its weight on mathematical reasoning. Importantly, domain-specific fine-tuned models often outperform all three on narrow tasks. Locking into one provider means accepting mediocrity somewhere — and your users will notice before you do.
Here’s what real failure looks like. A fintech startup in 2024 ran all customer interactions through GPT-4 Turbo. Their monthly API bill hit $47,000. After switching to a multi-model architecture — routing simple queries to GPT-4o Mini and reserving GPT-4 Turbo for complex financial analysis — they cut costs by 62%. That’s not a hypothetical. That’s arithmetic catching up with architecture.
The Cost-Per-Token Math That Makes Multi-Model Routing Essential
Numbers don’t lie. The token economics of 2025 make the case almost embarrassingly obvious.
| Model | Input Cost (per 1M tokens) | Output Cost (per 1M tokens) | Best Use Case | Relative Speed |
|---|---|---|---|---|
| GPT-4o | $2.50 | $10.00 | Multimodal, general reasoning | Medium |
| GPT-4o Mini | $0.15 | $0.60 | Simple tasks, classification | Fast |
| Claude 3.5 Sonnet | $3.00 | $15.00 | Long-context analysis, coding | Medium |
| Claude 3.5 Haiku | $0.25 | $1.25 | Quick responses, summarization | Fast |
| DeepSeek-R1 | ~$0.55 | ~$2.19 | Math, logic, reasoning | Medium-Slow |
| Llama 3.1 70B (self-hosted) | ~$0.10* | ~$0.10* | Privacy-sensitive, high-volume | Variable |
*Self-hosted costs vary by infrastructure. Estimates based on typical GPU pricing from AWS.
The spread here is enormous — and that’s the whole point.
Routing a million simple classification requests through Claude 3.5 Sonnet costs $3.00 in input alone. The same job through Claude 3.5 Haiku costs $0.25 — a 12x difference. Additionally, quality on simple tasks is nearly identical between the two. Simple tasks don’t need a sledgehammer.
Furthermore, DeepSeek’s pricing has genuinely disrupted the market. For reasoning-heavy workloads, DeepSeek-R1 delivers results competitive with GPT-4o at roughly 22% of the cost. This isn’t speculation — published benchmarks from LMSYS confirm the performance parity on structured reasoning tasks.
So the multi-model strategy argument becomes pure arithmetic. If 70% of your requests are simple, route them to cheap fast models and save the expensive ones for the 30% that actually need them. Your bill drops. Your speed improves. Your accuracy stays the same or gets better.
That’s not a tradeoff. That’s a free lunch — and those are rare enough in engineering that you should take them.
The Decision Matrix: Which Models to Layer and When
Knowing you need multiple models is step one. Knowing which models to pick is step two. Here’s a practical decision matrix that production teams actually use — not the theoretical version you see in conference talks.
Tier 1 — Fast inference models. These handle high-volume, low-complexity tasks. Think intent classification, simple Q&A, content moderation, and entity extraction.
- Best picks: GPT-4o Mini, Claude 3.5 Haiku, Gemini 1.5 Flash
- Target latency: Under 500 milliseconds
- Cost priority: Lowest possible per token
- Quality bar: 85%+ accuracy is sufficient
Tier 2 — General reasoning models. These tackle moderate complexity. Conversational AI, content generation, code completion, and multi-step workflows live here.
- Best picks: GPT-4o, Claude 3.5 Sonnet, Gemini 1.5 Pro
- Target latency: 1–5 seconds acceptable
- Cost priority: Balanced — you’re paying for quality here, and that’s fine
- Quality bar: 92%+ accuracy expected
Tier 3 — Deep reasoning and specialized models. Complex analysis, mathematical proofs, legal document review, and scientific reasoning all require this tier. The latency is real, so set user expectations accordingly.
- Best picks: OpenAI o1, DeepSeek-R1, domain fine-tuned models
- Target latency: 10–60 seconds acceptable
- Cost priority: Accuracy over cost — this isn’t the place to pinch pennies
- Quality bar: 97%+ accuracy required
Tier 4 — Self-hosted and privacy-critical models. When data can’t leave your infrastructure, open-weight models become essential. No debate.
- Best picks: Llama 3.1 (various sizes), Mistral Large, Qwen 2.5
- Target latency: Depends on hardware
- Cost priority: Fixed infrastructure cost vs. per-token API cost
- Quality bar: Task-dependent
The multi-model strategy means you’re not choosing one tier — you’re building a routing layer across all four. Similarly, your routing logic should evaluate each incoming request and assign it to the cheapest model that meets the quality threshold for that specific task.
Moreover, this matrix isn’t static. New models launch monthly, so your routing weights should update quarterly at minimum. Hugging Face’s Open LLM Leaderboard is the best free resource for tracking which models lead on which benchmarks.
Building the Routing Layer: Practical Architecture Patterns
Theory is easy. Implementation is where teams stumble — and where the real engineering decisions happen.
Here are three proven patterns for multi-model routing that work in production.
Pattern 1: Complexity-based routing. A lightweight classifier — often a small fine-tuned model itself — scores each incoming request on complexity. Simple requests go to Tier 1. Complex requests escalate. This is the most common pattern and the easiest to set up.
Steps to build it:
- Collect 1,000+ labeled examples of requests at each complexity level
- Fine-tune a small classifier (BERT-sized works fine — don’t overthink the architecture)
- Set confidence thresholds — if the classifier isn’t sure, route up
- Monitor accuracy per tier weekly
- Adjust thresholds based on user feedback and quality metrics
Pattern 2: Cascade routing. Start every request at the cheapest model. If the response quality score falls below a threshold, automatically retry with a more capable model. This works well when you can evaluate output quality programmatically.
Notably, cascade routing adds latency for hard queries — but it saves significant money on easy ones. The tradeoff is worth it when 60%+ of your traffic is simple. I’ve tested this pattern on several deployments and the savings consistently outweigh the latency penalty.
Pattern 3: Task-specific routing. Different API endpoints map to different models. Your code generation endpoint uses Claude 3.5 Sonnet, your summarization endpoint uses GPT-4o Mini, and your reasoning endpoint uses DeepSeek-R1. This is the simplest pattern conceptually, but it requires clear task boundaries — which not every product has.
Regardless of pattern, you need an orchestration layer. Tools like LiteLLM provide a unified API interface across providers. Consequently, switching models requires changing a config file rather than rewriting application code. That alone is worth the setup time.
The multi-model strategy principle extends to your orchestration too. Don’t lock into one routing framework. Keep your abstraction layer thin and swappable — because the tooling is evolving just as fast as the models themselves.
The 2025–2026 Competitive Picture and Why Lock-In Is Dangerous
The AI model market is moving fast. Dangerously fast for anyone betting on a single provider.
Here’s what the competitive picture tells us about why a multi-model strategy protects your roadmap — not just your budget.
Anthropic’s Claude trajectory. Claude has gained significant ground in enterprise adoption. Its 200K token context window and strong coding performance make it a favorite for developer tools — and it deserves the reputation. However, Anthropic’s pricing sits at the premium end. Additionally, Claude’s availability has historically been less consistent than OpenAI’s during peak demand. That’s not a dealbreaker, but it’s worth building around.
OpenAI’s model range. OpenAI now offers at least six distinct model tiers — GPT-4o, GPT-4o Mini, o1, o1-mini, and more. They’re effectively building their own multi-model strategy within a single provider. Nevertheless, relying solely on OpenAI means accepting their pricing changes, rate limits, and policy updates without alternatives. That’s a lot of trust to place in one vendor’s roadmap.
DeepSeek’s disruption. DeepSeek shook the market by showing that cost-efficient reasoning models are genuinely viable — not just cheap and mediocre, but actually competitive. Their open-weight approach means you can self-host. Conversely, their infrastructure is based in China, which creates compliance concerns for some enterprise deployments. Know your regulatory environment before you commit.
Open-weight momentum. Meta’s Llama series, Mistral’s models, and Alibaba’s Qwen family keep improving at a pace that’s hard to keep up with. Meta AI’s Llama page shows the rapid release cadence. For teams with GPU infrastructure, these models remove per-token costs entirely — and that’s a fundamentally different cost structure worth modeling out.
The pattern is clear. No single provider will dominate all use cases. Therefore, architectural flexibility isn’t a luxury — it’s insurance.
Consider what happened when OpenAI deprecated older models in 2024. Teams with single-provider dependencies scrambled to rewrite prompts and retune evaluations. Teams with multi-model architectures simply rerouted traffic. The difference was days of painful downtime versus zero downtime. The payoff from flexibility isn’t visible until something breaks — and then it’s very visible.
Measuring Success: KPIs for Your Multi-Model Architecture
You can’t improve what you don’t measure. Here are the KPIs that actually matter for a multi-model deployment — not vanity metrics, but the ones that connect to business outcomes.
- Cost per successful response. Not just cost per token — cost per response that meets your quality bar. This captures both token costs and retry costs from cascade routing.
- P95 latency by task type. Measure the 95th percentile response time for each task category. Your routing should keep every task type within its SLA.
- Model utilization ratio. What percentage of requests hit each tier? If 90% still go to your most expensive model, your routing logic needs work.
- Quality score drift. Track accuracy, helpfulness, and safety scores weekly. Models change as providers update them, so catch regressions early — before your users catch them first.
- Fallback rate. How often does cascade routing escalate to a higher tier? A rising fallback rate signals that your cheaper models are losing effectiveness — or that your traffic mix is shifting.
Specifically, a well-built multi-model strategy should show measurable improvement across all five KPIs within the first month. If it doesn’t, your routing logic — not the strategy itself — needs adjustment. Don’t scrap the architecture because the routing needs tuning.
Additionally, set up A/B tests when adding new models to your stack. Route 10% of traffic to the new model and compare quality and cost against your current default. Promote it to full traffic only when your actual traffic data supports it — not just when the benchmark looks good.
Monitoring tools matter here. Langfuse provides open-source LLM observability that tracks cost, latency, and quality across multiple providers. It’s purpose-built for multi-model architectures and genuinely useful rather than just another dashboard to ignore.
Conclusion
The evidence is overwhelming — and at this point, the argument is basically closed.
A multi-model strategy is the only architecture that survives contact with production reality. Single-model deployments waste money, miss latency targets, and create dangerous vendor lock-in. The math, the case studies, and the competitive picture all point the same direction.
Here are your actionable next steps:
- Audit your current model usage. Categorize every API call by complexity and task type. You’ll likely find that 50–70% of requests don’t need your most expensive model — and that finding alone usually justifies the whole project.
- Set up a routing layer this quarter. Start with complexity-based routing — it’s the simplest pattern and delivers the fastest ROI. Don’t wait for a perfect architecture before you start.
- Add at least one alternative provider. If you’re all-in on OpenAI, add Claude or DeepSeek for specific tasks. If you’re all-in on Anthropic, add GPT-4o Mini for simple queries. One additional provider changes your leverage entirely.
- Set up monitoring from day one. Track cost per successful response, latency by task type, and quality scores across all models. You need this data before you can optimize anything.
- Review your model stack quarterly. The market changes fast. New models launch constantly, and your architecture should adapt — not get locked to last year’s best options.
The multi-model strategy conclusion isn’t theoretical. It’s the lived experience of every team running AI at scale. Build for flexibility now, or rebuild from scratch later.
FAQ
What is a multi-model strategy in AI?
A multi-model strategy uses different AI models for different tasks based on cost, speed, and accuracy requirements. Instead of routing every request to one model, you layer models by strength — cheap fast models handle simple tasks, while expensive powerful models handle complex ones. This approach improves both cost and quality at the same time, and it’s far more straightforward to implement than most teams expect.
How much money can a multi-model architecture save?
Savings depend on your traffic mix. However, teams typically report 40–70% cost reductions after setting up tiered routing. The savings come from redirecting simple requests away from premium models. Importantly, quality on those simple tasks stays the same or improves — because faster models often respond more consistently to straightforward queries.
Is the multi-model strategy right for small teams too?
Absolutely. Small teams arguably benefit more because they’re working with tighter budgets and less margin for waste. A startup spending $5,000 monthly on API costs can realistically cut that to $1,500–$2,000 with smart routing. Furthermore, tools like LiteLLM make multi-model setups achievable without dedicated infrastructure engineers. The strategy scales down just as well as it scales up — it’s not just an enterprise play.
How do I decide which model to use for which task?
Start by categorizing your tasks into complexity tiers. Simple classification and extraction go to the cheapest model. General conversation and content generation go to mid-tier models. Complex reasoning and analysis go to premium models. Then run quality evaluations on each tier and adjust routing thresholds based on actual performance data — your intuitions about task complexity are usually slightly off.
What are the risks of a multi-model approach?
The main risks are increased architectural complexity, inconsistent response formatting across models, and the overhead of maintaining multiple provider integrations. Additionally, prompt behavior varies between models, so you may need model-specific prompt templates — which is more work than it sounds. Nevertheless, these risks are manageable and far smaller than the risks of single-model lock-in. The complexity is real, but it’s the kind you control.
How often should I reevaluate my model choices?
Quarterly at minimum — and monthly isn’t overkill right now. The AI model market changes rapidly, new models launch constantly, and existing models receive updates that can shift performance in ways that aren’t always announced clearly. Specifically, maintain a benchmark suite that you run against candidate models each quarter. Track the LMSYS Chatbot Arena leaderboard for real-world performance comparisons. A solid multi-model strategy means your architecture stays current as the market evolves — not locked to the decisions you made six months ago.
References
Keep reading
Here are the latest posts from the blog.

The future of health monitoring isn’t sitting in a hospital. It’s on your skin. AI biosensing UC San Diego’s breakthrough wearable technology is fundamentally changing how we…
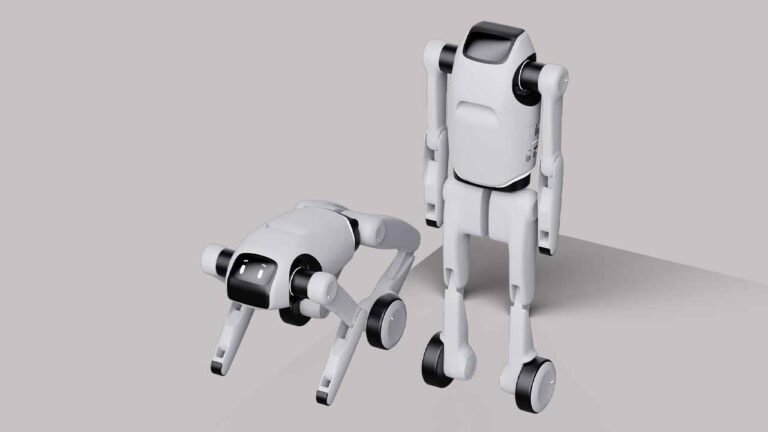
Here’s the thing: the data isn’t subtle. Narrow-use robots outselling humanoids 20 founders should be studying isn’t some fringe contrarian take — it’s the dominant commercia…

Meta Muse Spark AI features capabilities release date — these three things are dominating every tech conversation I’m having right now. And honestly? The timing couldn’t be m…