New York’s new law effective today requires advertisers to disclose when their ads feature AI-generated performers. And honestly? This has been a long time coming. Starting today, any brand running ads with synthetic human likenesses in New York must label them — clearly and conspicuously, no squinting required.
This isn’t a gentle suggestion. It’s a legally enforceable obligation with real teeth. Furthermore, it signals a broader shift in how states are thinking about AI-generated content in commercial settings. Brands, agencies, and creative teams need to get up to speed fast — both on what’s required and what happens when they don’t comply.
What New York’s New Law Requires From Advertisers
The legislation targets a specific category of AI content: synthetic performers. These are digitally created or manipulated human likenesses used in advertisements. Specifically, the law covers AI-generated faces, voices, and bodies that could reasonably be mistaken for real people.
I’ve been watching this space closely for the past two years, and the definition here is broader than most people expect.
Key compliance requirements include:
- A clear and conspicuous disclosure on every ad featuring a synthetic performer
- The label must be visible to consumers before or during their interaction with the ad
- Disclosures must use plain language that average consumers can understand
- The requirement applies across all advertising formats — digital, print, broadcast, and social media
Notably, the law doesn’t ban synthetic performers outright. Brands can still use AI-generated talent — however, they must tell consumers what they’re looking at. The transparency mandate reflects growing concern about deepfakes and synthetic media in commercial contexts, and frankly, that concern is warranted.
Who does it apply to? The law covers any entity that creates, distributes, or publishes covered advertisements within New York State — advertisers, ad agencies, media buyers, and publishers. Consequently, the compliance burden extends across the entire advertising supply chain. Nobody gets to pass the buck here.
What counts as a “synthetic performer”? The definition is deliberately broad. It includes:
- Fully AI-generated human likenesses
- Real people whose appearance has been materially altered using AI
- AI-cloned voices used in audio or video ads
- Digital recreations of deceased individuals
The breadth of this definition matters — a lot. Even minor AI modifications to a performer’s appearance could trigger the disclosure requirement. Consider a practical example: a brand shoots a real model for a skincare campaign, then uses an AI tool to smooth her complexion, alter her eye color, and adjust her jawline. That combination of edits almost certainly crosses the “materially altered” threshold, even though the underlying performer is real. Therefore, brands need clear internal guidelines about when and how they’re using generative AI tools. If you don’t have those guidelines yet, today’s a rough day to find out.
A useful internal test: ask whether a reasonable consumer, seeing the final ad, would assume they’re looking at an unaltered human being. If AI tools have meaningfully changed that answer, you likely need a disclosure.
Enforcement Mechanisms and Penalties for Non-Compliance
Understanding what New York’s new law effective today requires is only half the battle. You also need to know what happens when things go wrong.
Penalty structure at a glance:
| Violation Type | Potential Penalty | Enforcement Body |
|---|---|---|
| First offense | Civil fine up to $5,000 per violation | NY Attorney General |
| Repeat offense | Escalating fines, potential injunctive relief | NY Attorney General |
| Willful violation | Enhanced penalties plus potential litigation | NY AG + private action |
| Pattern of deception | Consumer protection investigation | NY Department of State |
The New York Attorney General’s office holds primary enforcement authority. Additionally, the law may open the door to private causes of action in certain circumstances — and that dual enforcement model creates serious legal exposure for anyone who decides to wing it.
Here’s the real kicker: each individual ad placement counts as a separate violation.
That’s not a typo. A single non-compliant creative running across 1,000 digital placements could theoretically generate $5 million in fines. The math gets uncomfortable fast, and I’ve seen brands underestimate exactly this kind of cascading penalty structure before. A mid-sized retailer running a programmatic display campaign across hundreds of publisher sites — with one non-compliant AI-generated banner — could rack up exposure faster than any legal team can respond. That’s not a hypothetical designed to scare you; it’s a realistic description of how modern ad distribution works.
Nevertheless, regulators have signaled they’ll prioritize education during the initial rollout. But don’t mistake that for leniency. Brands that ignore the requirement entirely will face consequences — and importantly, the “we didn’t know” defense won’t hold up. The law’s effective date has been public for months. No one gets a pass on that.
The State-by-State AI Disclosure Picture
New York isn’t operating in a vacuum. New York’s new law effective today requires disclosure specifically for synthetic performers in ads — meanwhile, other states are pursuing their own approaches to AI transparency, and the picture is getting complicated.
Current state-level AI disclosure laws and proposals:
| State | Focus Area | Status | Key Requirement |
|---|---|---|---|
| New York | Synthetic performers in ads | Effective today | Clear labeling of AI-generated talent |
| California | AI-generated election content | Signed into law | Disclosure on political deepfakes |
| Illinois | AI in hiring decisions | Active | Notification when AI screens candidates |
| Texas | AI-generated deepfakes | Active | Criminal penalties for harmful deepfakes |
| Washington | Synthetic media | Proposed | Broad disclosure requirements |
| Colorado | AI governance | Active | Complete AI risk framework |
California’s approach through AB 2655 and related bills focuses heavily on election-related synthetic content. Similarly, Texas targets malicious deepfakes with criminal penalties. However, New York’s law is uniquely focused on commercial advertising — which is what makes it such a significant moment for the industry specifically.
This patchwork creates a genuine compliance headache for national advertisers. A campaign running in all 50 states now has to track varying requirements across jurisdictions. Imagine a national fast-food chain launching a campaign that uses an AI-generated spokesperson in TV spots, digital pre-rolls, and in-store displays simultaneously. The New York placements need disclosure labels. The California placements may have different requirements if the content touches political themes. The Texas placements carry criminal exposure if the content is deemed harmful. Managing those distinctions at scale, across a media buy involving dozens of partners, is genuinely hard. Consequently, a lot of brands are simply adopting the strictest standard as their baseline — it’s easier than managing state-by-state variations, and moreover, it future-proofs you somewhat.
Federal action remains uncertain. Congress has introduced several AI-related bills, but none have gained enough momentum. The National Institute of Standards and Technology (NIST) has published AI risk management frameworks — notably solid work, honestly — yet these remain voluntary guidelines rather than enforceable mandates. Therefore, state laws like New York’s are filling the regulatory gap whether the industry likes it or not.
Additionally, the European Union’s AI Act includes transparency requirements for AI-generated content. Multinational brands already adapting to EU rules may find New York’s requirements less burdensome. Domestic-only advertisers, however, face a steeper learning curve — fair warning on that one.
How Brands Are Adapting Creative Workflows
The practical impact of New York’s new law effective today requires real changes to how creative teams operate. This surprised me a little when I started digging into it — the workflow implications run deeper than just slapping a label on a finished ad.
Workflow changes brands are implementing:
- AI usage tracking — Creative teams now log every instance of generative AI in production. Tools like Adobe Firefly and Midjourney are flagged in project management systems from the start.
- Legal review checkpoints — New approval gates ensure compliance review before any AI-enhanced creative goes live. Legal teams assess whether content triggers disclosure requirements at each stage.
- Disclosure template libraries — Brands are building standardized disclosure language and visual treatments. These templates keep labeling consistent across campaigns rather than reinventing the wheel each time.
- Vendor contract updates — Agencies are revising contracts with production partners. New clauses require disclosure of any AI-generated elements in delivered assets — no more ambiguity about what was and wasn’t generated.
- Training programs — Creative directors and producers are receiving compliance training. Everyone in the chain needs to understand what triggers the labeling requirement, not just the legal team.
The disclosure design challenge is real, though. The law requires labels to be “clear and conspicuous,” but it doesn’t specify exact formatting. Brands must balance legal compliance with creative execution. A massive disclaimer plastered across a polished ad defeats the purpose of the creative. But a tiny footnote nobody reads won’t satisfy regulators either. It’s a genuine tension, and I haven’t seen a universally elegant solution yet.
Some brands are getting creative with their disclosure approaches. Interactive digital ads can include hover-state disclosures. Video ads can use brief text overlays or audio disclaimers. Print ads typically place disclosures near the synthetic performer’s image. One approach gaining traction in digital formats is a small but legible badge — think something similar to the “Ad” labels already familiar from social media — placed consistently in a corner of the creative. It’s unobtrusive enough not to wreck the visual design, but prominent enough to hold up under regulatory scrutiny. Specifically, the brands doing this well are treating it as a design problem, not just a legal one.
Cost implications vary significantly. Smaller brands relying heavily on AI-generated content face proportionally higher compliance costs — they need legal review resources they may not currently have. Larger brands with established compliance infrastructure can absorb the changes more easily. Furthermore, some brands are reconsidering their use of synthetic performers altogether, because the disclosure requirement introduces friction. And if consumers react negatively to labeled AI content, the business case for synthetic performers weakens considerably. Early consumer research suggests mixed reactions — some people don’t care, while others find it genuinely unsettling. That’s a real variable worth tracking.
Industry Impact and the Future of AI in Advertising
New York’s new law effective today requires the advertising industry to confront a fundamental question: how transparent should AI usage actually be in commercial content? I’ve been writing about ad tech for a decade, and I don’t think the industry has fully processed what that question means yet.
Immediate industry impacts include:
- Talent agencies repositioning real human performers as a premium, disclosure-free alternative
- AI tool providers building compliance features directly into their platforms
- Ad tech companies developing automated disclosure systems for programmatic ads
- Media buyers adding compliance verification to their quality assurance processes
The talent representation angle is particularly interesting to me. SAG-AFTRA and other unions have advocated strongly for synthetic performer regulations. They view these laws as protecting human performers from being silently replaced by AI. The disclosure requirement doesn’t prevent replacement — but it does make it visible. That’s not nothing. Some talent agencies are already marketing their rosters explicitly as “disclosure-free” options, positioning human performers as the lower-friction, lower-risk creative choice. Whether that framing resonates with brand clients remains to be seen, but the commercial logic is sound.
Consumer trust is the underlying currency here. Research from the Pew Research Center consistently shows Americans want more transparency around AI. Mandatory disclosure aligns with those preferences — and brands that embrace transparency proactively may actually build stronger consumer relationships as a result. Moreover, the law creates interesting competitive dynamics. Brands using real performers can now differentiate themselves — “100% human talent” could become a genuine selling point. Conversely, brands that use synthetic performers honestly and openly might earn trust through that transparency. Both paths are viable.
What comes next? Several trends are emerging:
- More states will follow. New York’s law creates a template. Expect at least five additional states to introduce similar legislation within 18 months — the momentum is clearly there.
- Federal standards may eventually emerge. State-level fragmentation typically accelerates federal action, and Congress will face increasing pressure to create uniform rules.
- Industry self-regulation will expand. Trade groups like the Interactive Advertising Bureau (IAB) are developing voluntary guidelines that complement rather than replace legal requirements.
- Technology solutions will mature. Content authentication standards like C2PA (Coalition for Content Provenance and Authenticity) will become more widely adopted — and notably, they can’t come soon enough.
Additionally, the intersection with intellectual property law creates unresolved questions that nobody’s cleanly answered yet. If a synthetic performer resembles a real person, disclosure alone may not be enough. Right of publicity claims could layer additional legal exposure on top of labeling requirements — and that’s a can of worms I’d want an attorney helping me open. A brand that generates a synthetic spokesperson who happens to share a strong resemblance with a recognizable public figure faces potential right of publicity liability entirely separate from the disclosure violation. These are not hypothetical edge cases; generative AI tools produce uncanny resemblances with some regularity, and brands need a review step specifically designed to catch them.
Conclusion
Bottom line: New York’s new law effective today requires advertisers to clearly label any AI-generated synthetic performers in their ads. The mandate is active. Compliance isn’t optional. And the “we’ll deal with it later” approach is exactly how you end up with a $5 million fine from a single campaign.
Here are your actionable next steps:
- Audit your current campaigns — Identify any ads running in New York that feature synthetic performers or AI-modified human likenesses
- Set up disclosure labels immediately — Add clear, conspicuous labeling to every qualifying ad before enforcement actions begin
- Update your creative workflows — Build AI usage tracking and legal review checkpoints into your production process
- Train your teams — Ensure everyone involved in creative production understands what triggers the disclosure requirement
- Monitor other states — Track emerging legislation in California, Illinois, Texas, and other states pursuing similar mandates
- Consult legal counsel — Work with attorneys who specialize in advertising law and AI regulation to ensure full compliance
Brands that adapt quickly will cut their legal risk and — importantly — potentially earn genuine consumer trust in the process. Those that ignore the requirement face escalating fines and serious reputational damage. The era of unlabeled synthetic performers in advertising is officially over, and honestly, I think that’s the right call.
FAQ
What exactly does New York’s new law effective today require advertisers to do?
The law says that any advertisement featuring AI-generated synthetic performers must include a clear and conspicuous disclosure. This applies to fully AI-generated human likenesses, materially AI-altered real people, cloned voices, and digital recreations of deceased individuals. The disclosure must be visible to consumers before or during their interaction with the ad — and it applies across all advertising formats, including digital, print, broadcast, and social media.
Who is responsible for compliance under this synthetic performer disclosure law?
Responsibility extends across the entire advertising supply chain. Advertisers, agencies, media buyers, and publishers all share compliance obligations. Specifically, any entity that creates, distributes, or publishes a covered advertisement within New York State must ensure proper labeling. Therefore, brands should update vendor contracts to include AI disclosure requirements and establish clear accountability within their teams — because everyone pointing at someone else won’t fly as a defense. A practical starting point is a short written agreement addendum that requires any production vendor or creative agency to certify, at the point of asset delivery, whether AI-generated or AI-modified human likenesses appear in the work.
What are the penalties for not complying with New York’s synthetic performer labeling requirement?
Civil fines can reach up to $5,000 per violation, with each individual ad placement counting as a separate violation. Repeat and willful violations face escalating penalties, including potential injunctive relief. The New York Attorney General holds primary enforcement authority. Importantly, a single non-compliant creative running across thousands of placements could generate massive cumulative fines — the numbers scale faster than most people realize.
Does this law ban the use of AI-generated performers in advertising?
No. New York’s new law effective today requires disclosure, not prohibition. Brands can continue using synthetic performers in their advertising — however, they must clearly tell consumers that the performer is AI-generated or AI-modified. The law is fundamentally about transparency, not restriction. Nevertheless, the disclosure requirement may lead some brands to rethink their reliance on synthetic talent, particularly if consumer reactions turn negative.
How should brands format their AI disclosure labels to comply?
The law requires disclosures to be “clear and conspicuous” but doesn’t mandate specific formatting. Brands have flexibility in how they present labels. Best practices include placing disclosures near the synthetic performer’s image, using plain language consumers can easily understand, and ensuring the label is legible across all devices and formats. Additionally, video ads can use text overlays or audio disclaimers, while digital ads can incorporate interactive disclosure elements. One practical tradeoff to keep in mind: shorter, simpler language like “AI-generated performer” is easier for consumers to process quickly, while longer explanatory text may satisfy regulators more thoroughly but risks being ignored. Testing both approaches with real users before finalizing your template is worth the time. Treat this as a design challenge, not just a legal checkbox.
Are other states implementing similar AI disclosure laws for advertising?
Yes — and the list is growing. California, Illinois, Texas, and several other states have enacted or proposed AI-related disclosure legislation. However, most focus on different areas like elections or hiring. New York’s law is uniquely focused on synthetic performers in commercial advertising. Consequently, national advertisers should adopt the strictest standard as their baseline to simplify multi-state compliance. Federal legislation remains uncertain, making state-level laws the primary regulatory framework for now — and similarly, that’s unlikely to change quickly.
References
Keep reading
Here are the latest posts from the blog.

When you hear context windows explained why size AI memory matters, think of it like a desk. A small desk limits what you can spread out. A large one lets you see everything…
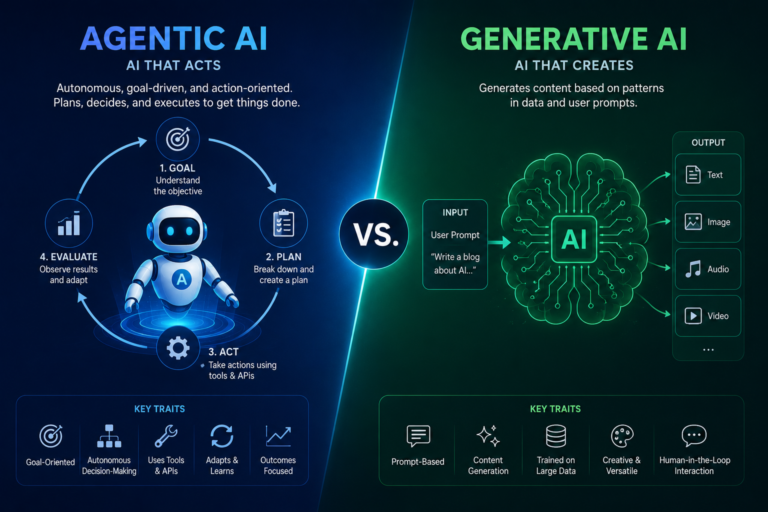
Understanding agentic AI vs. generative AI what’s difference is no longer something you can put off. These two paradigms are actively reshaping how companies operate, compete…

Apple refused to comply with EU rules, and now Gemini Siri won’t be launching in Europe anytime soon. That one decision sends shockwaves through the global tech industry. It…